> ## Documentation Index
> Fetch the complete documentation index at: https://docs.feedbackflowhq.com/llms.txt
> Use this file to discover all available pages before exploring further.
# Thinkific
> A step-by-step guide to integrate Thinkific with Feedbackflow.
## Install the Feedbackflow App
First things first – you'll need to install the Feedbackflow App from within your Thinkific account. Here are the steps you need to follow.
1. Log in to your Thinkific account and navigate to the \*\*Integrations \*\*section on the sidebar.
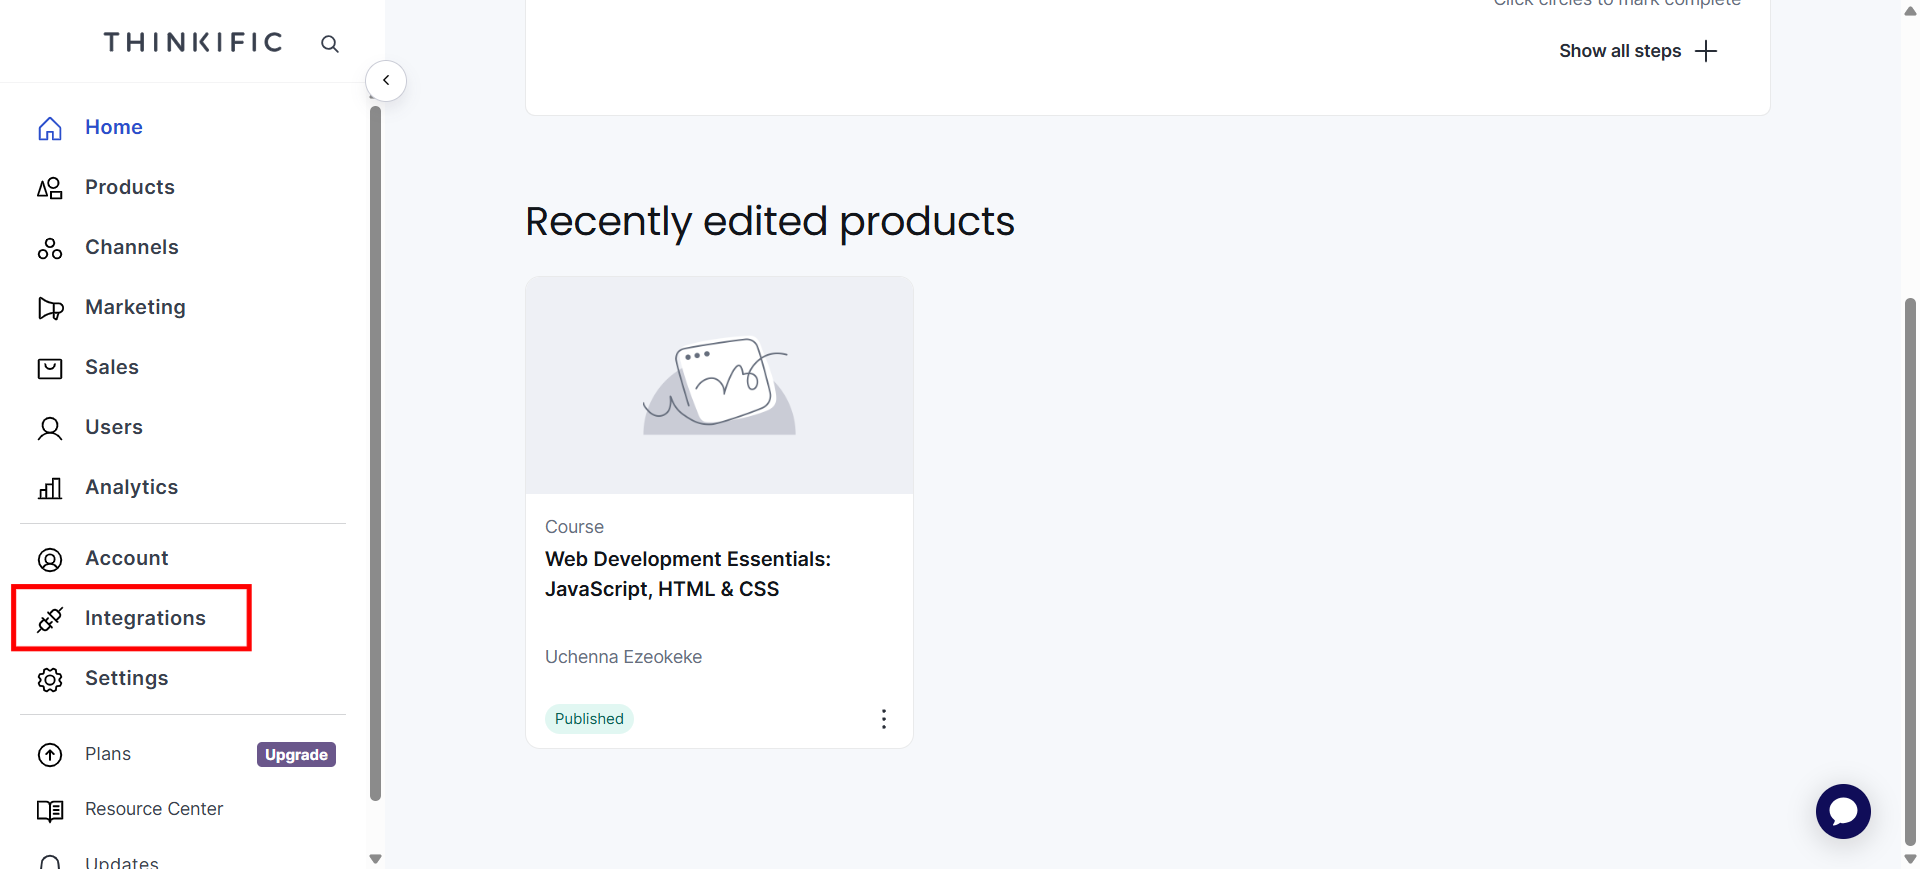 2. Access the Thinkific **App Store**, and search for **Feedbackflow** in the App Store.
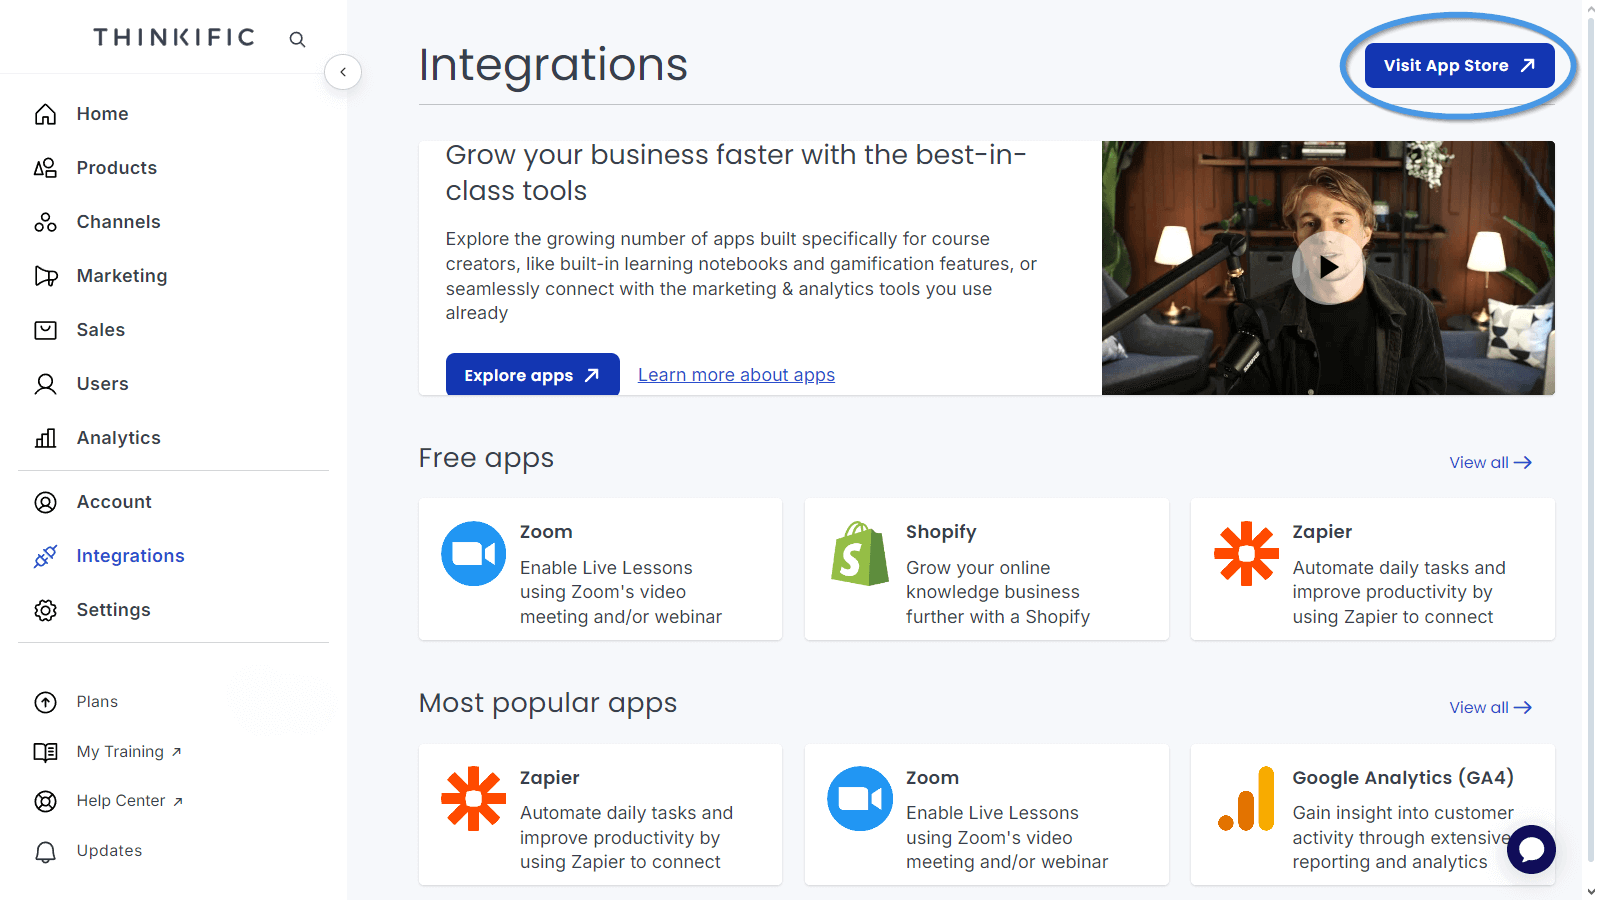 3. Click on the **Feedbackflow** app and then click on the **Install** button.
4. You will be prompted to give permission to Feedbackflow to use your Thinkific data to create an account. Select Accept & Install.
5. During the installation process, a Feedbackflow account will automatically be created for you, complete the registration and you’ll be directed to your Feedbackflow user dashboard.
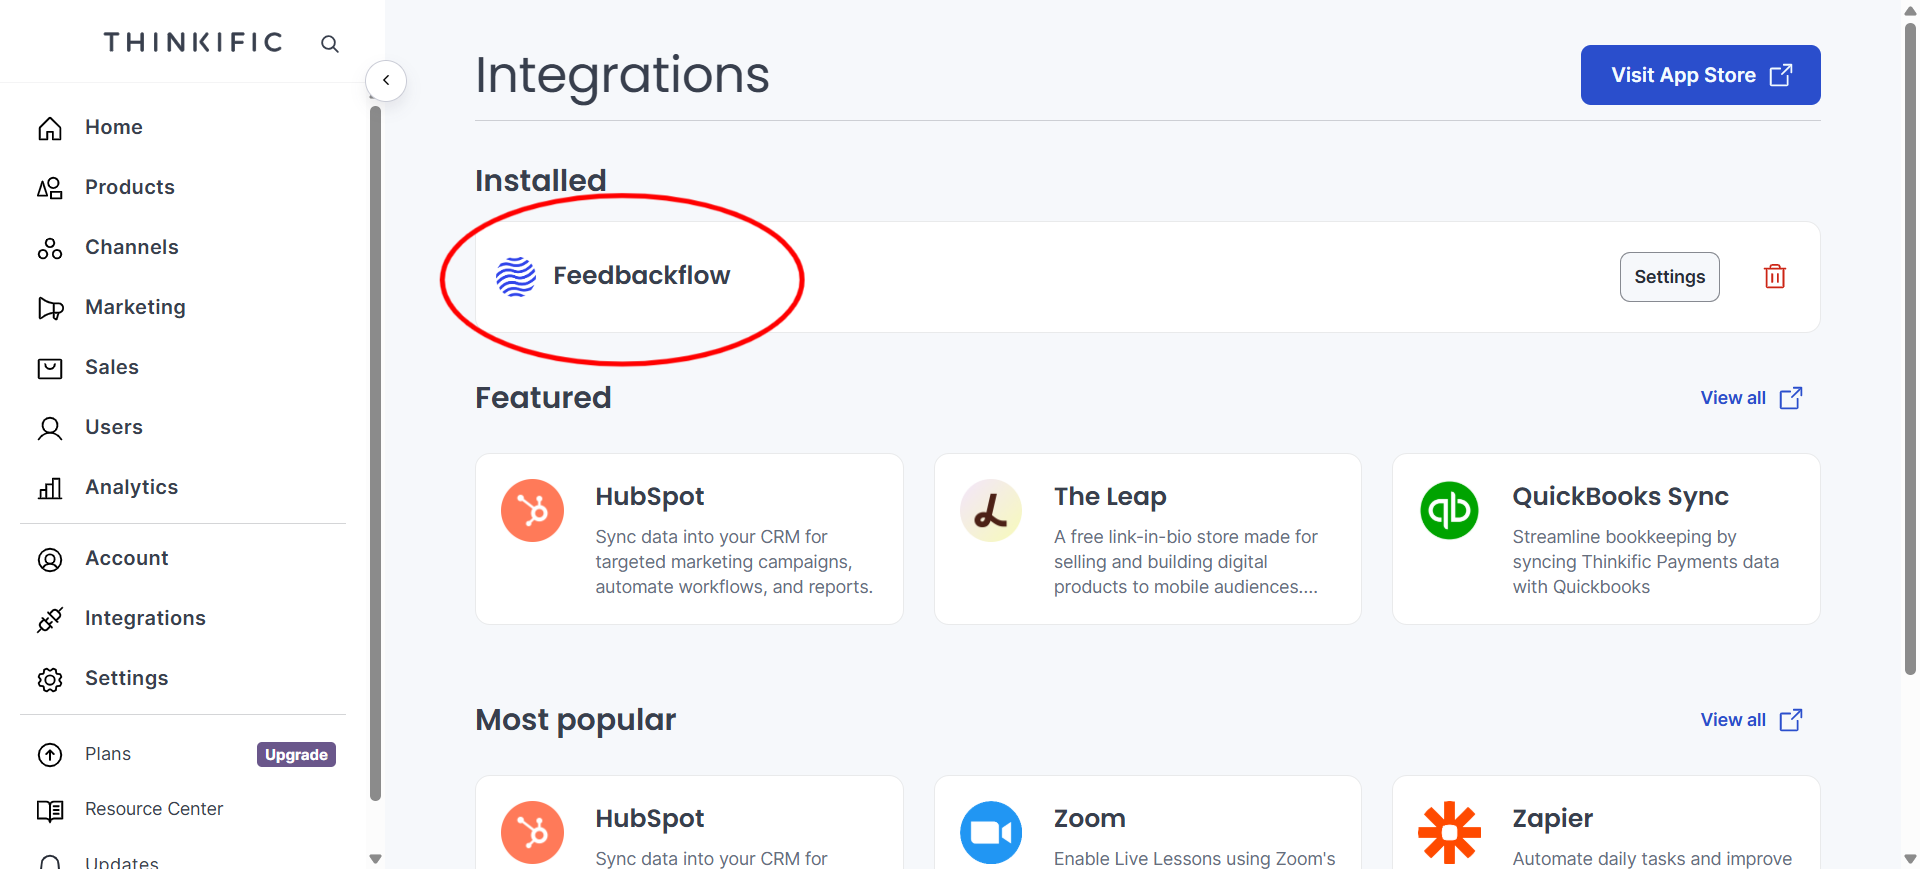
To check the app was installed successfully, return to the Integrations page on your Thinkific site and refresh the page. The Feedbackflow app should appear in the Installed Apps section at the top of the page.
3. Click on the **Feedbackflow** app and then click on the **Install** button.
4. You will be prompted to give permission to Feedbackflow to use your Thinkific data to create an account. Select Accept & Install.
5. During the installation process, a Feedbackflow account will automatically be created for you, complete the registration and you’ll be directed to your Feedbackflow user dashboard.
To check the app was installed successfully, return to the Integrations page on your Thinkific site and refresh the page. The Feedbackflow app should appear in the Installed Apps section at the top of the page.
 There are just a few more steps to add Surveys, NPS, CSAT to a page on your Thinkific website.
## Create a Survey
If you haven't already created a survey, once you are logged into your [Feedbackflow account](https://app.feedbackflowhq.com), you should see templates to choose from.
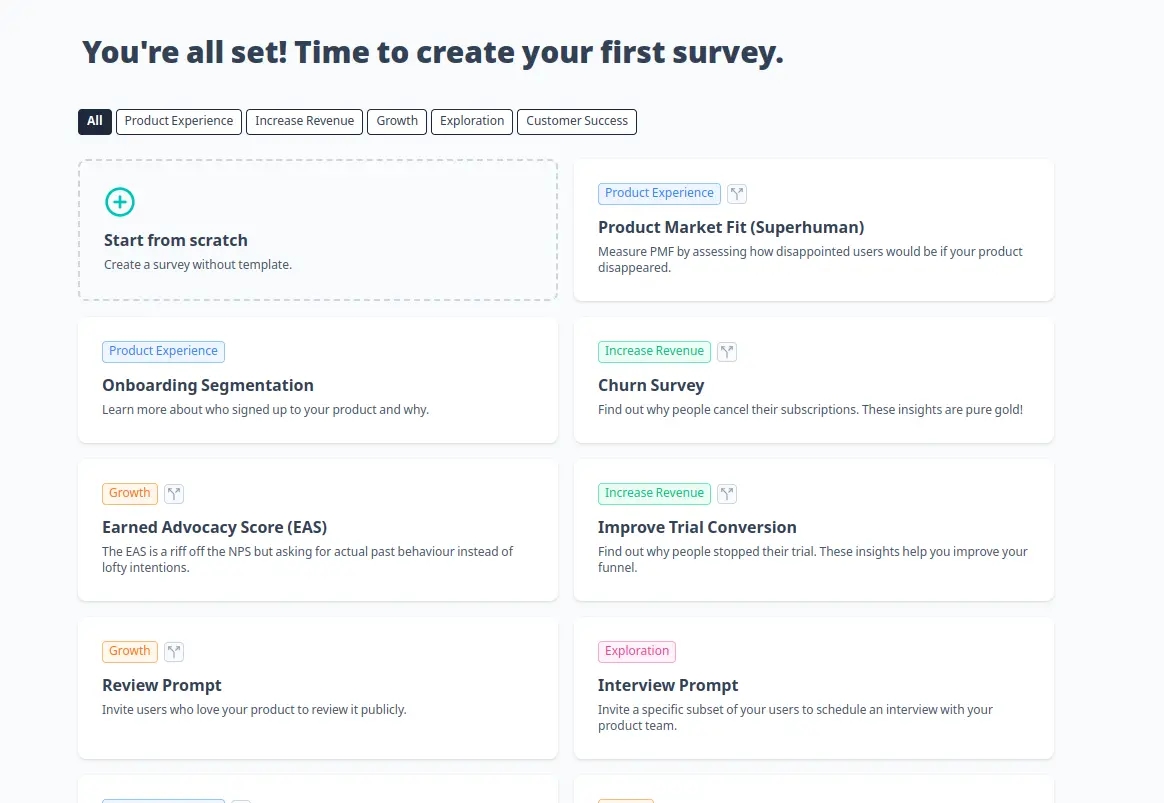
* **Create your first survey**: To be able to see a survey in your app, you need to create one. We’ll choose one of the templates and head over to the survey settings:
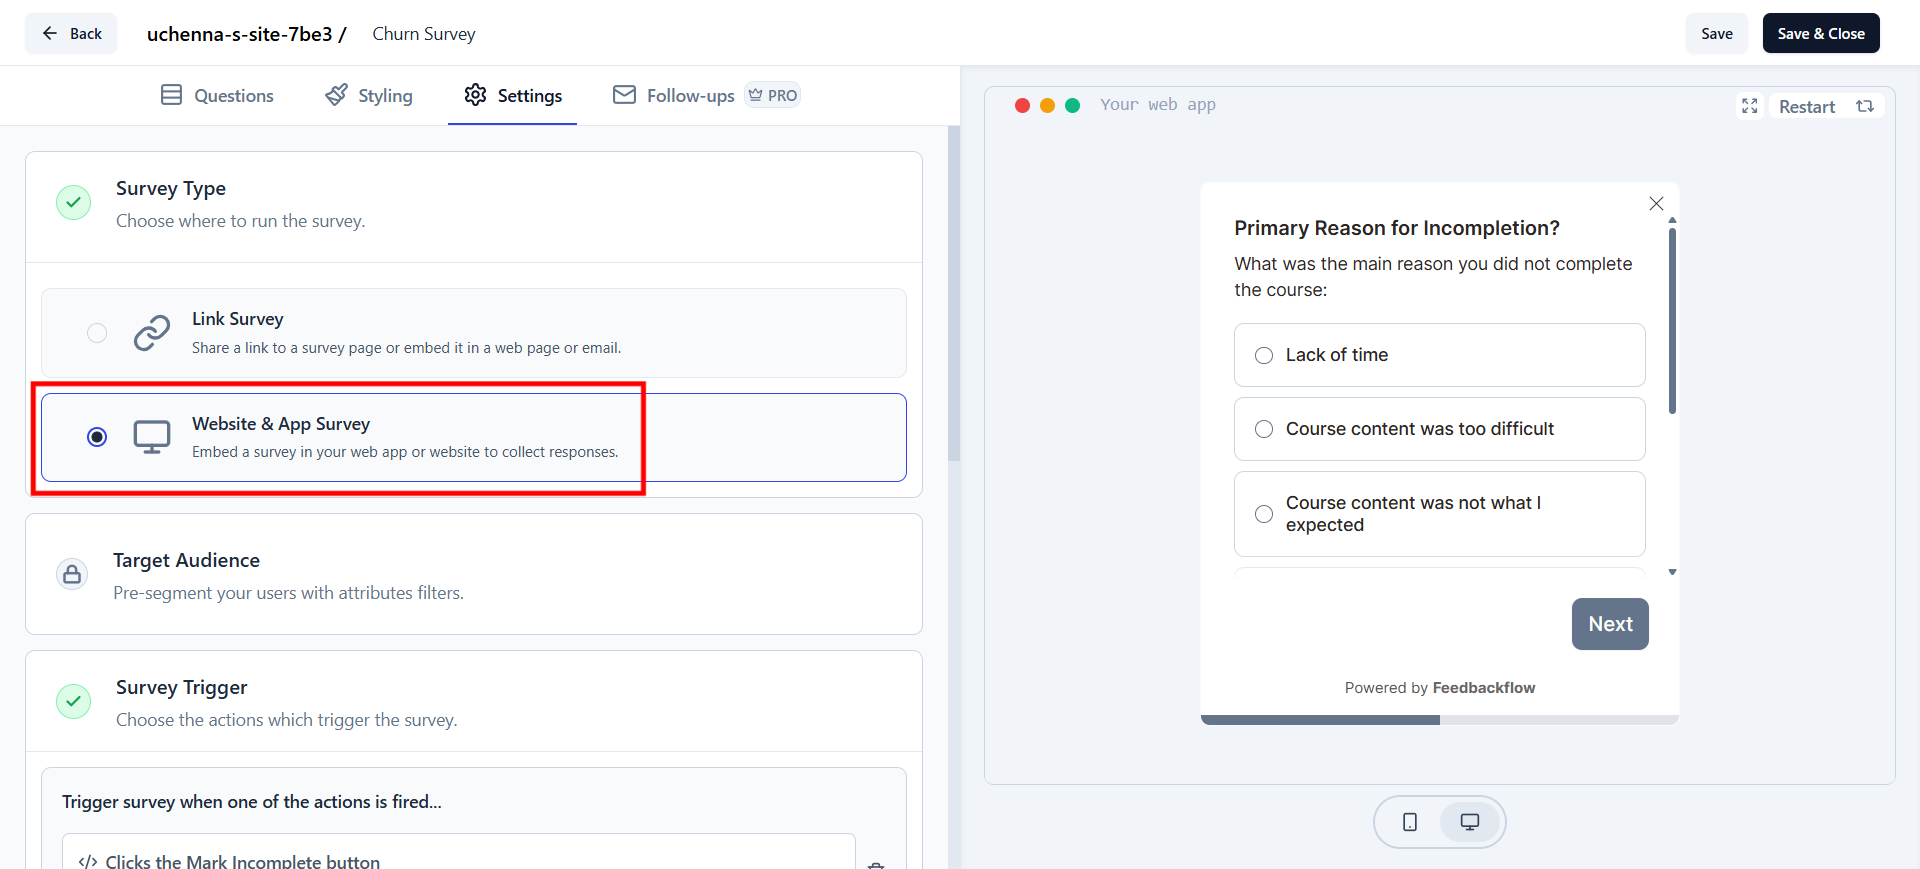
Pick the Survey Type as **App Survey**.
There are just a few more steps to add Surveys, NPS, CSAT to a page on your Thinkific website.
## Create a Survey
If you haven't already created a survey, once you are logged into your [Feedbackflow account](https://app.feedbackflowhq.com), you should see templates to choose from.

* **Create your first survey**: To be able to see a survey in your app, you need to create one. We’ll choose one of the templates and head over to the survey settings:
Pick the Survey Type as **App Survey**.
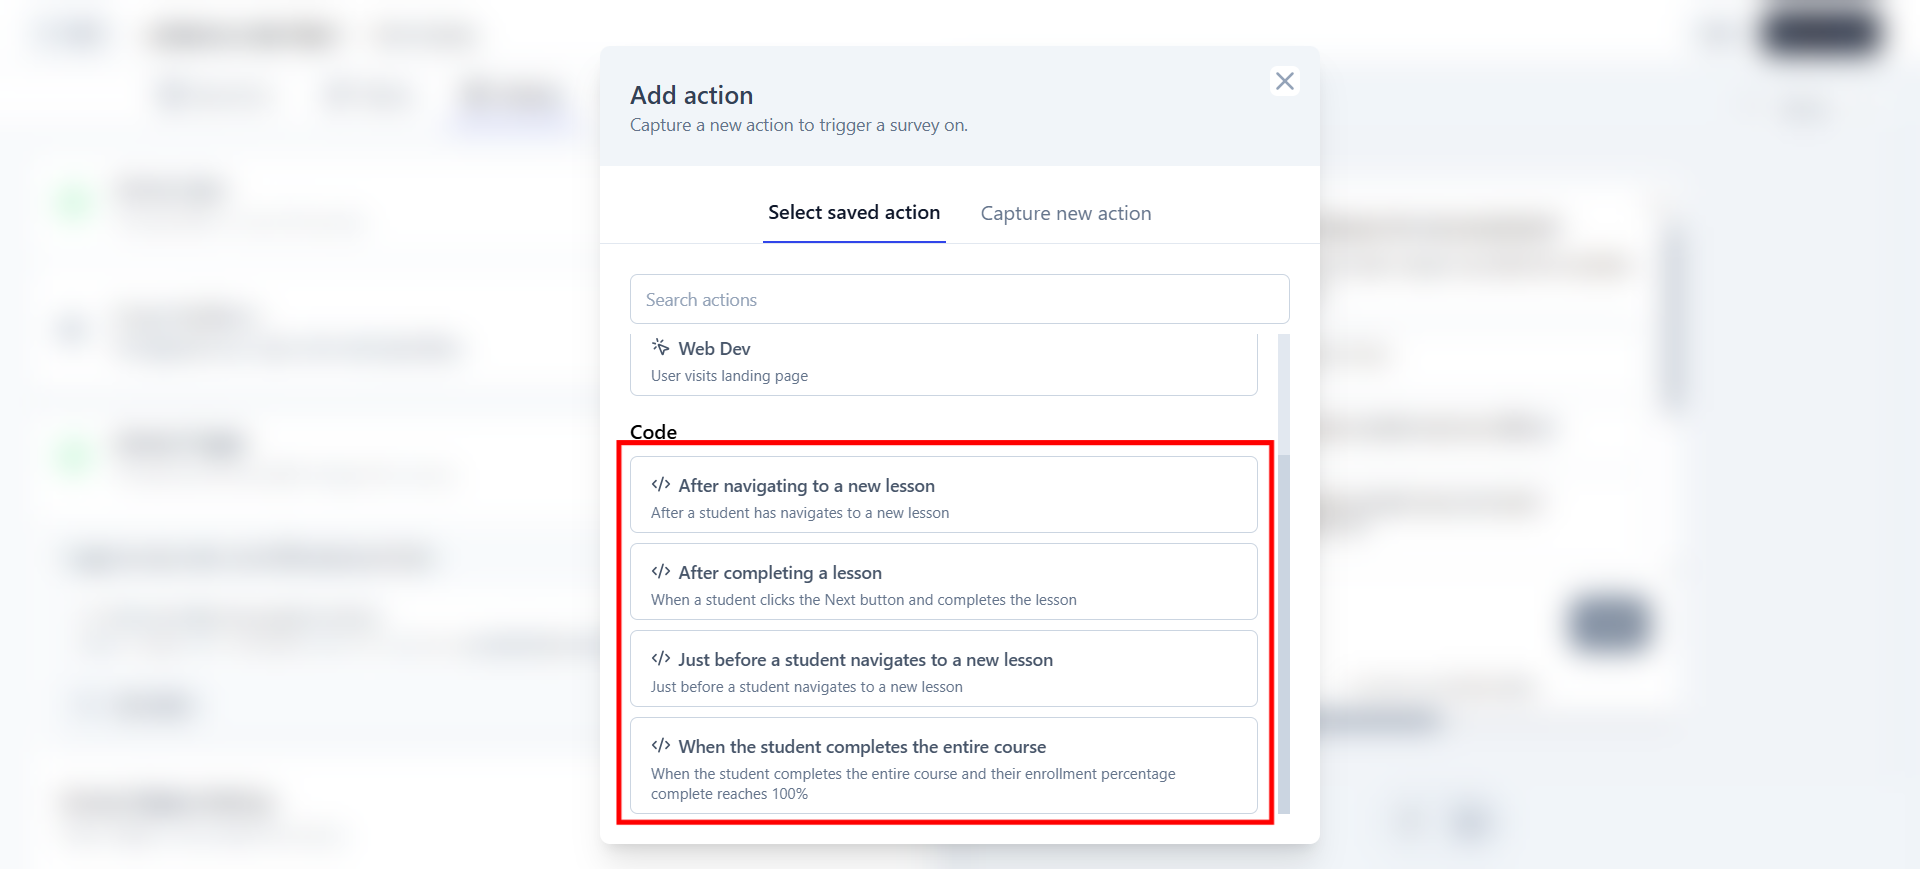
 * **Set Trigger for the Survey**: Scroll to **Survey Trigger**, click **+ Add Action**, and select **New Session**. This ensures the survey appears when the Feedbackflow Widget detects a new user session.
Feedbackflow automatically creates four actions for you when you install it on your Thinkific website, but you can add more if needed.
* **Set Trigger for the Survey**: Scroll to **Survey Trigger**, click **+ Add Action**, and select **New Session**. This ensures the survey appears when the Feedbackflow Widget detects a new user session.
Feedbackflow automatically creates four actions for you when you install it on your Thinkific website, but you can add more if needed.
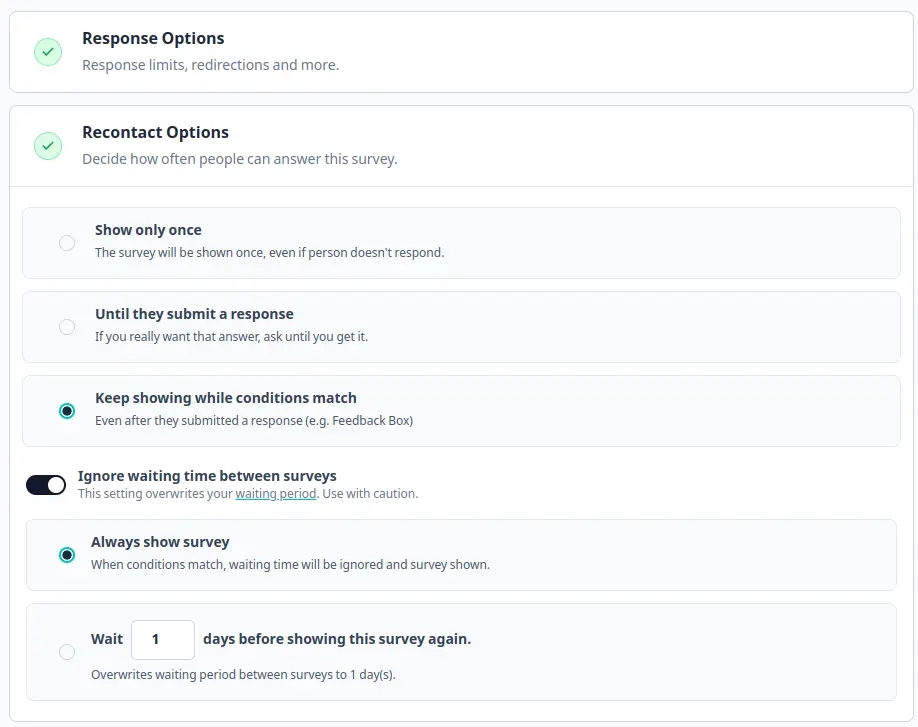
 * **Set Recontact Options for Debugging**: Adjust the **Recontact Options** to test the survey more easily. By default, surveys appear only once per user to prevent fatigue.
Please change this setting after testing your survey to avoid user fatigue.
* Click **Publish** to proceed to the **Summary Page**, where you can view survey responses.
That's it! You can now start collecting feedbacks, surveys etc from your Thinkific site. Click [here](/xm-and-surveys/surveys/website-app-surveys/actions) to learn more about how to use Actions to control how and where your surveys are displayed
* **Set Recontact Options for Debugging**: Adjust the **Recontact Options** to test the survey more easily. By default, surveys appear only once per user to prevent fatigue.
Please change this setting after testing your survey to avoid user fatigue.

* Click **Publish** to proceed to the **Summary Page**, where you can view survey responses.
That's it! You can now start collecting feedbacks, surveys etc from your Thinkific site. Click [here](/xm-and-surveys/surveys/website-app-surveys/actions) to learn more about how to use Actions to control how and where your surveys are displayed