> ## Documentation Index
> Fetch the complete documentation index at: https://docs.feedbackflowhq.com/llms.txt
> Use this file to discover all available pages before exploring further.
# Showit
> A step-by-step guide to integrate Webflow with Showit.
## Feedbackflow Dashboard
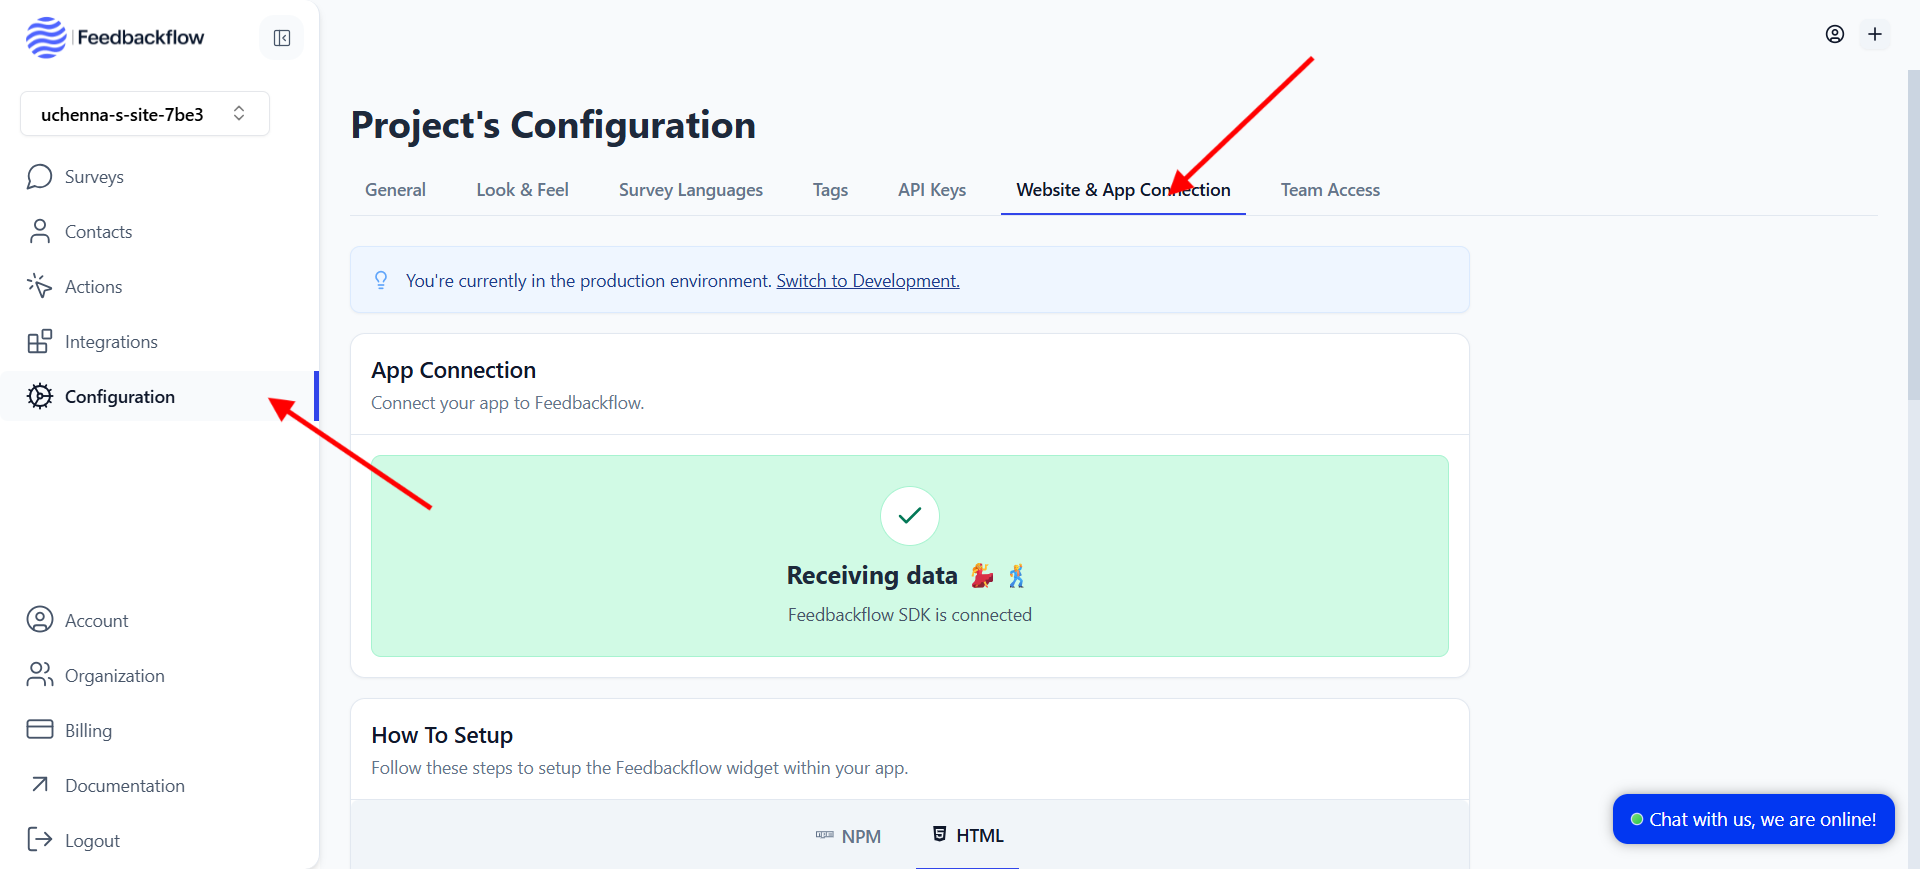
1. Go to the **Configuration** tab in your [Feedbackflow dashboard](https://app.feedbackflowhq.com/) and click on the **Website & App Connection** on the configuration page.
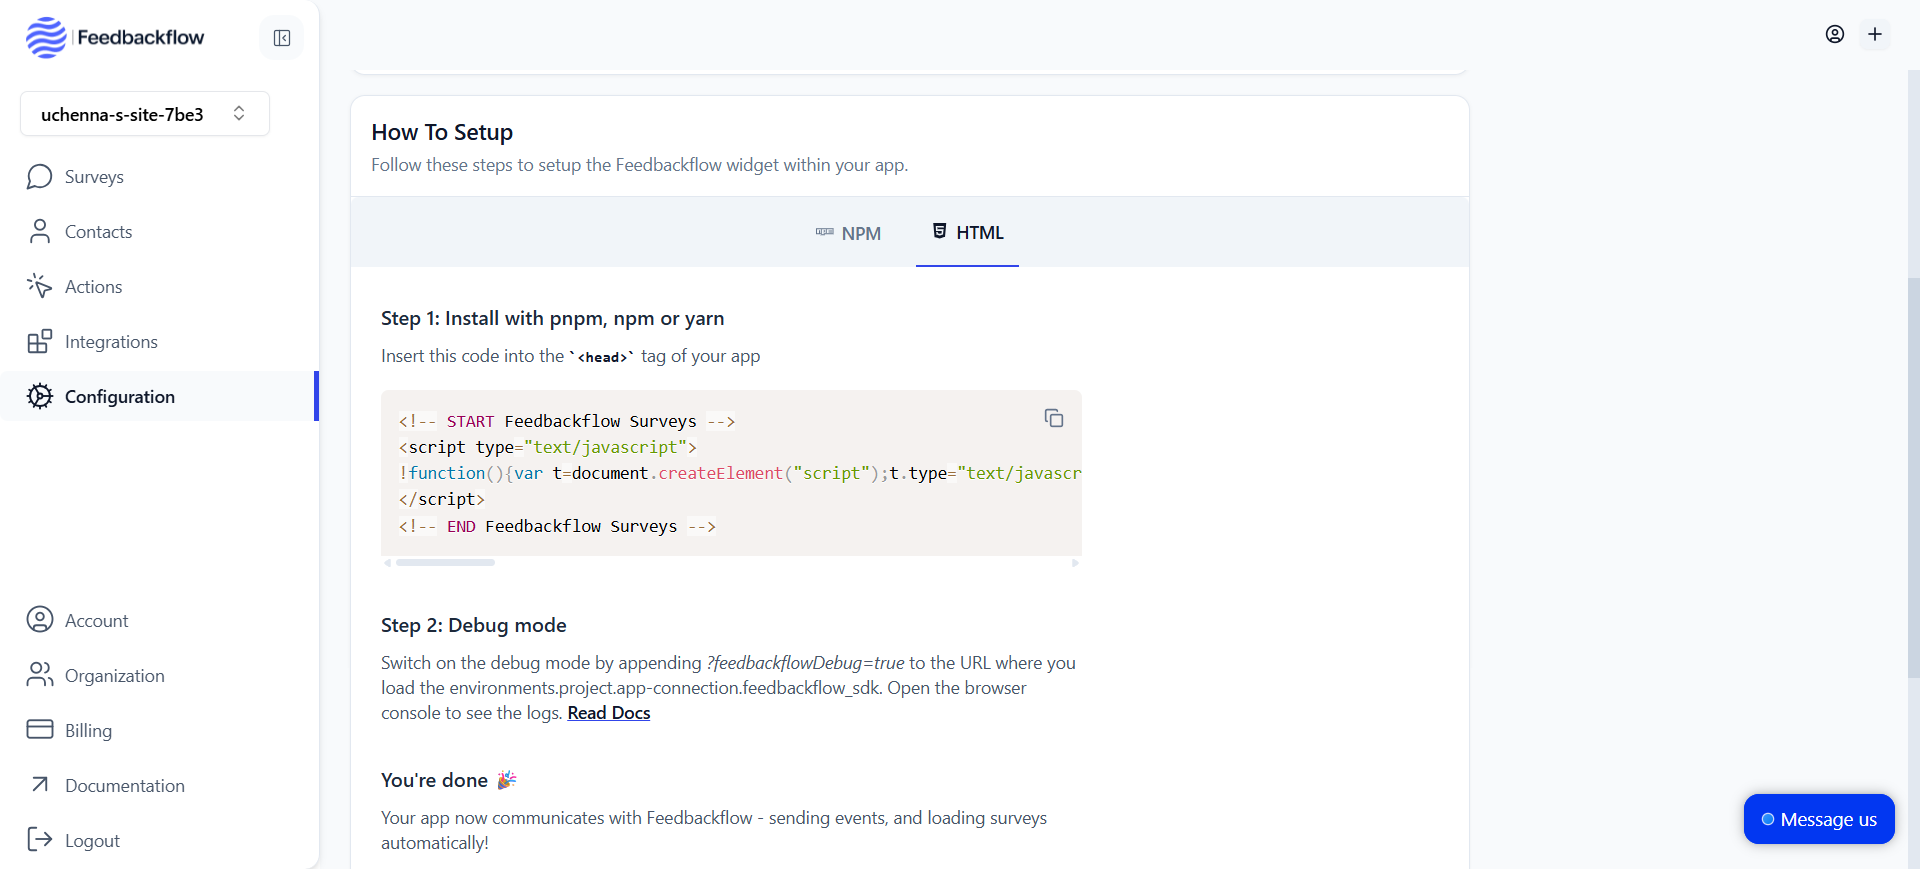
 2. Now scroll down a bit and go to **How To Setup** section, then click on **HTML** tab and copy the HTML code.
 3. You are then ready to integrate Feedbackflow with your Showit site.
* Open your Showit site in the Showit editor.
* open your [Site Settings](https://learn.showit.com/en/articles/2191123-site-settings) and go to the **Integrations** tab.
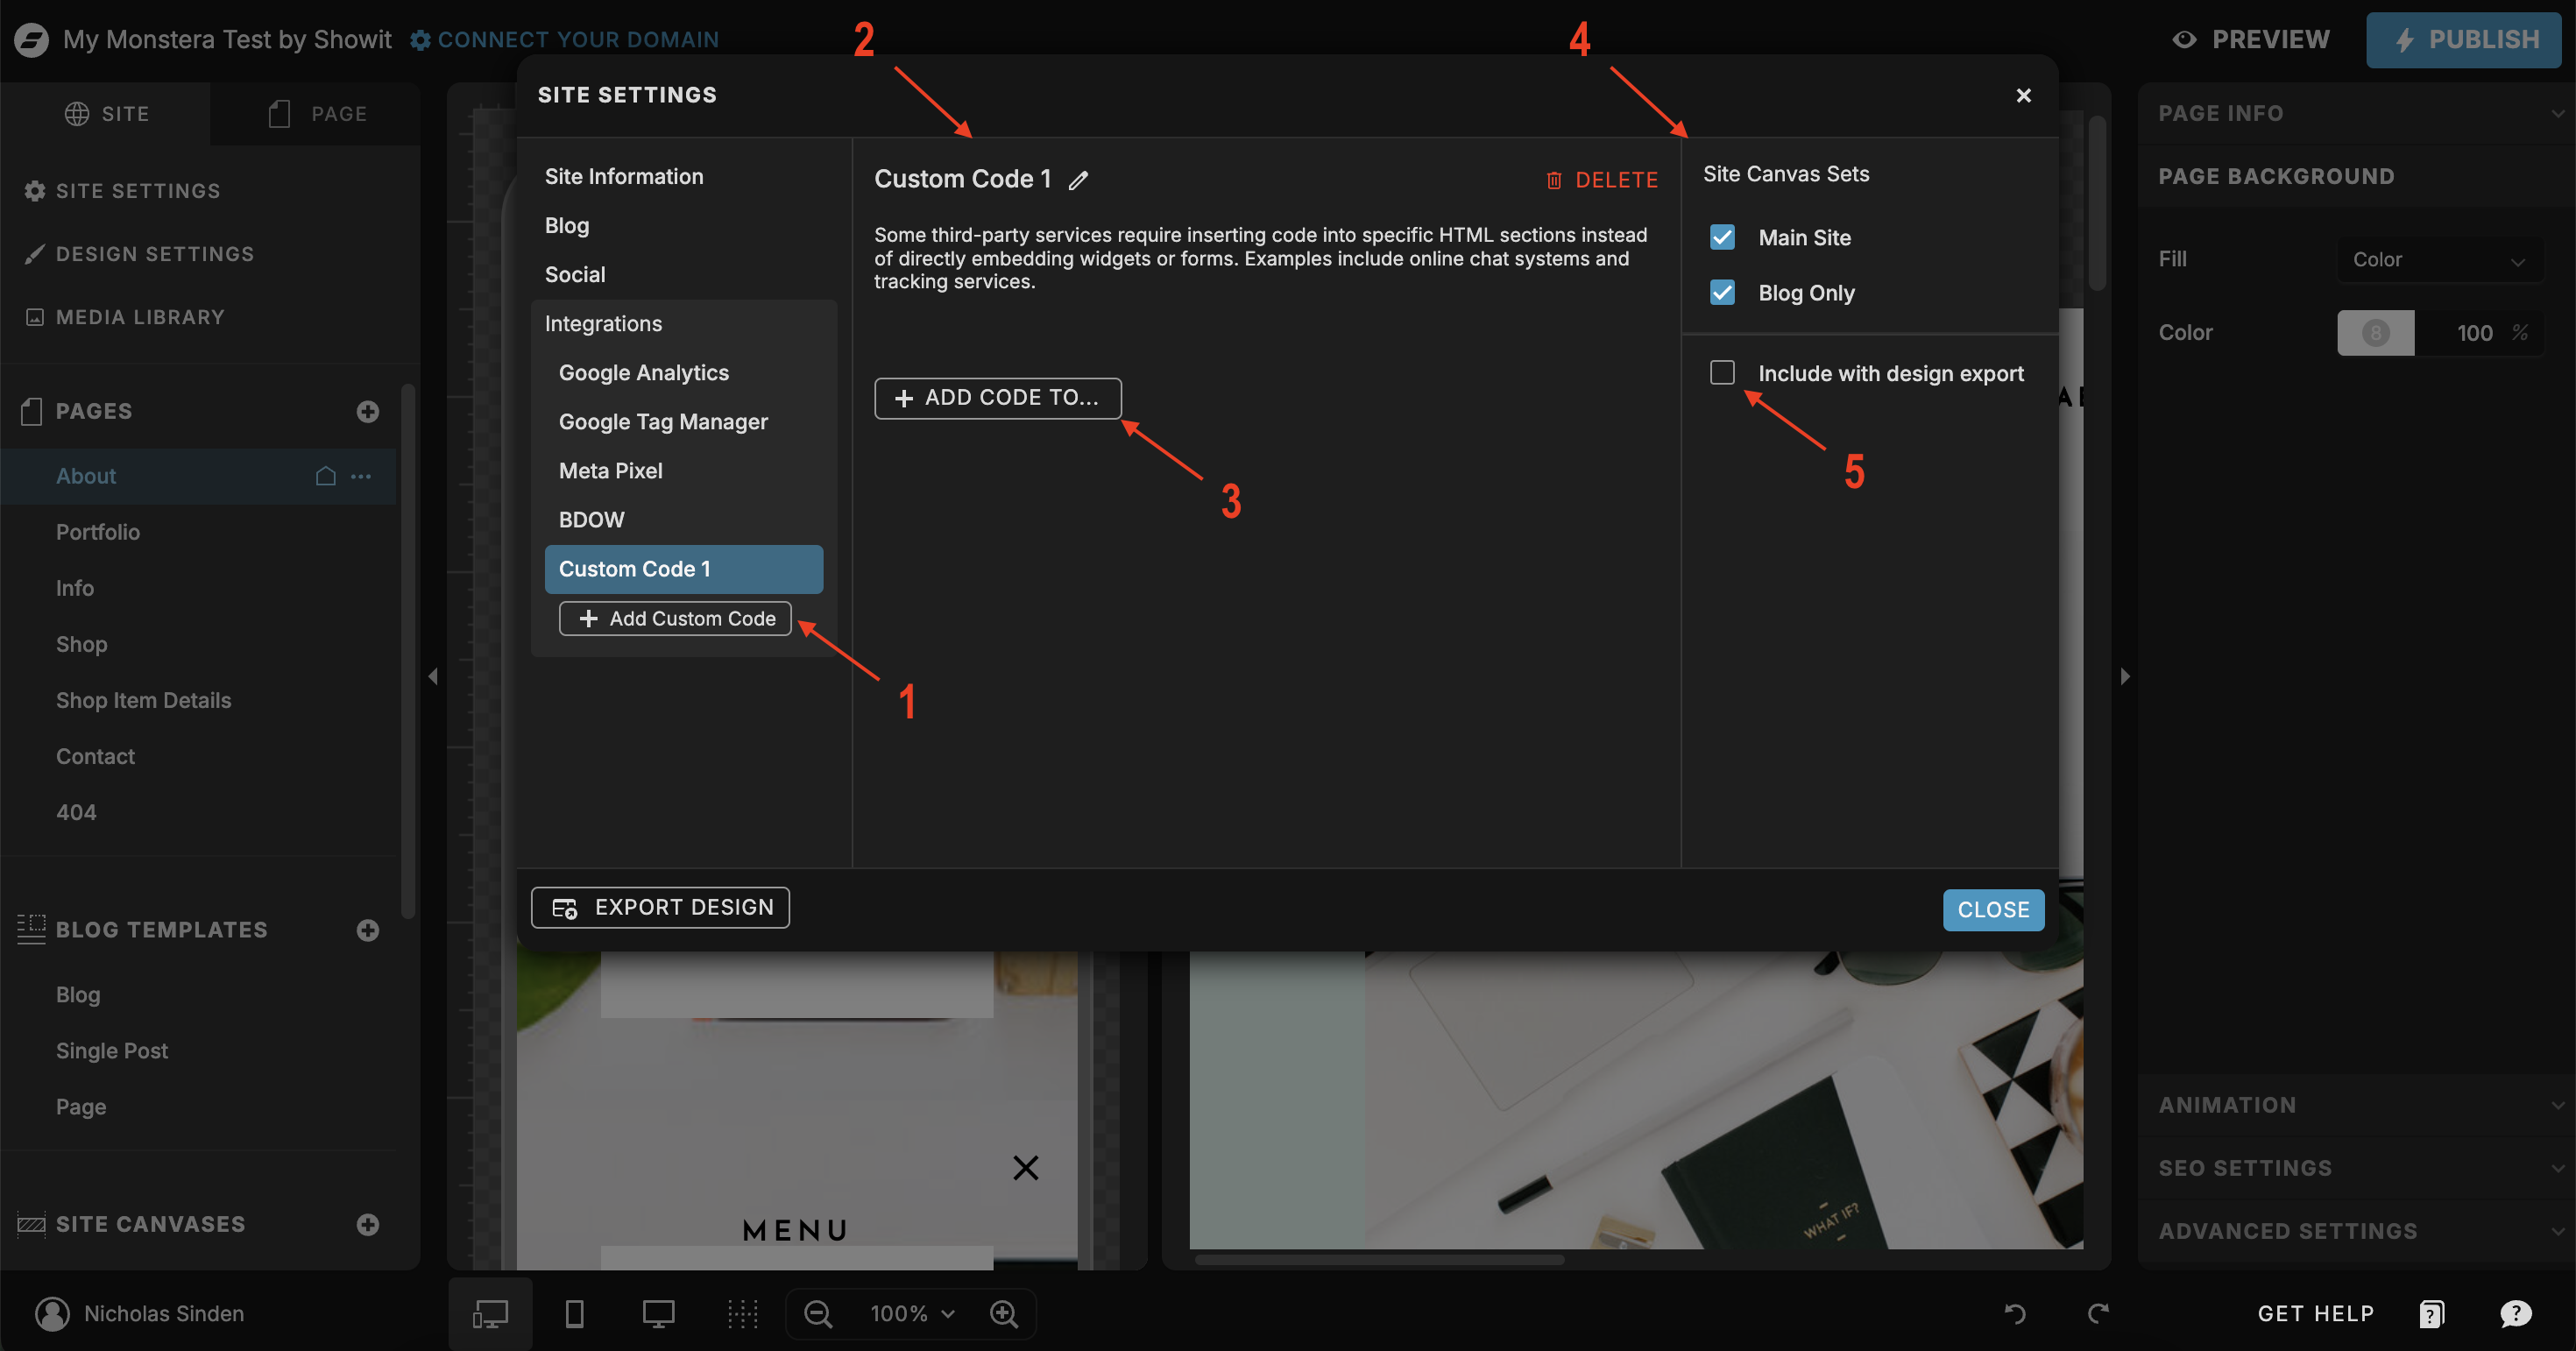
* There you have the option to **+ Add Custom Code**.
* Click **+ Add Custom Code** and it will take you to the Global Code Settings.
3. You are then ready to integrate Feedbackflow with your Showit site.
* Open your Showit site in the Showit editor.
* open your [Site Settings](https://learn.showit.com/en/articles/2191123-site-settings) and go to the **Integrations** tab.
* There you have the option to **+ Add Custom Code**.
* Click **+ Add Custom Code** and it will take you to the Global Code Settings.
 4. Name Your Custom Code
You can name your Global Code whatever you like. For example, you can name your code "Feedbackflow."
5. Add Code To...
You can choose where you would like to add the custom code to in your pages. Choose **Add HTML to the head**.
6. Paste the HTML Code
Paste the HTML code you copied from the Feedbackflow dashboard into the **Custom Code** field.
7. Site Canvas Sets
Choose which [Site Canvas Sets](https://learn.showit.com/en/articles/8196626-site-canvas-sets) that you would like to add your Global Code to.
If you do not have any Site Canvas Sets in your design, your Feedbackflow Code will not work.
8. Once you're done, you can now create or add your survey to your Showit site. Go to the **Surveys** tab in your [Feedbackflow dashboard](https://app.feedbackflowhq.com/) and click on **Create Survey**.
9. **Create or Update your survey**: To be able to see a survey in your Showit site, you need to create one.
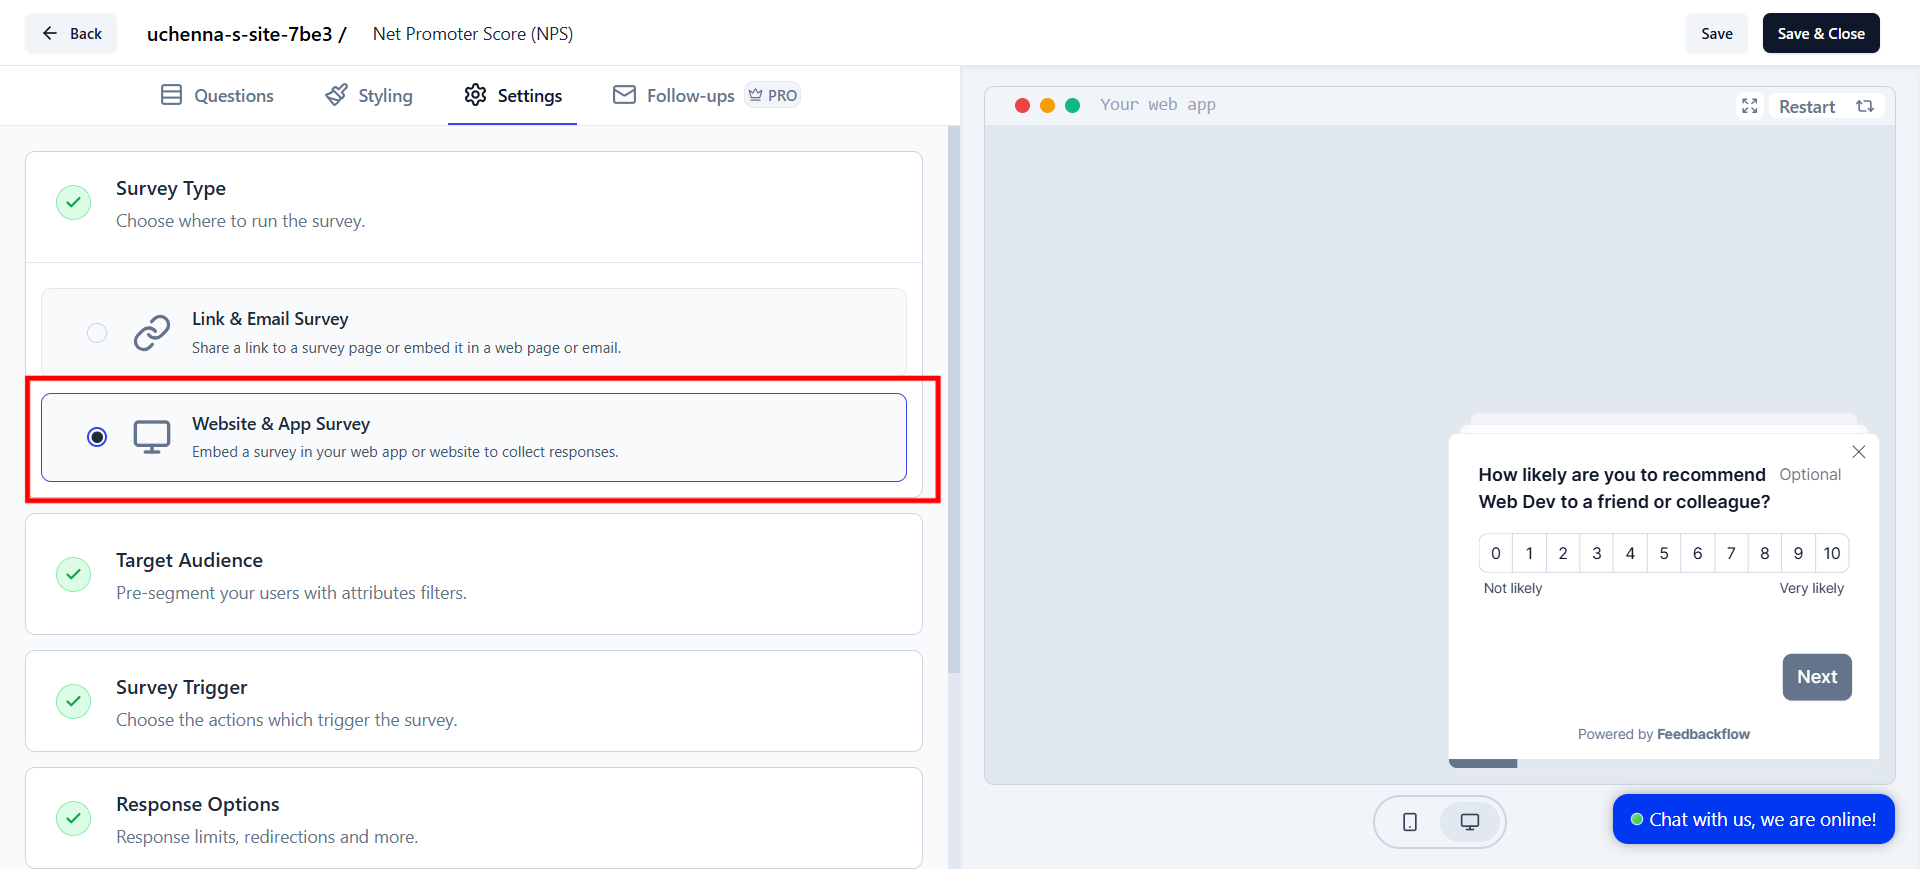
Pick the Survey Type as **Website & App Survey**.
4. Name Your Custom Code
You can name your Global Code whatever you like. For example, you can name your code "Feedbackflow."
5. Add Code To...
You can choose where you would like to add the custom code to in your pages. Choose **Add HTML to the head**.
6. Paste the HTML Code
Paste the HTML code you copied from the Feedbackflow dashboard into the **Custom Code** field.
7. Site Canvas Sets
Choose which [Site Canvas Sets](https://learn.showit.com/en/articles/8196626-site-canvas-sets) that you would like to add your Global Code to.
If you do not have any Site Canvas Sets in your design, your Feedbackflow Code will not work.
8. Once you're done, you can now create or add your survey to your Showit site. Go to the **Surveys** tab in your [Feedbackflow dashboard](https://app.feedbackflowhq.com/) and click on **Create Survey**.
9. **Create or Update your survey**: To be able to see a survey in your Showit site, you need to create one.
Pick the Survey Type as **Website & App Survey**.
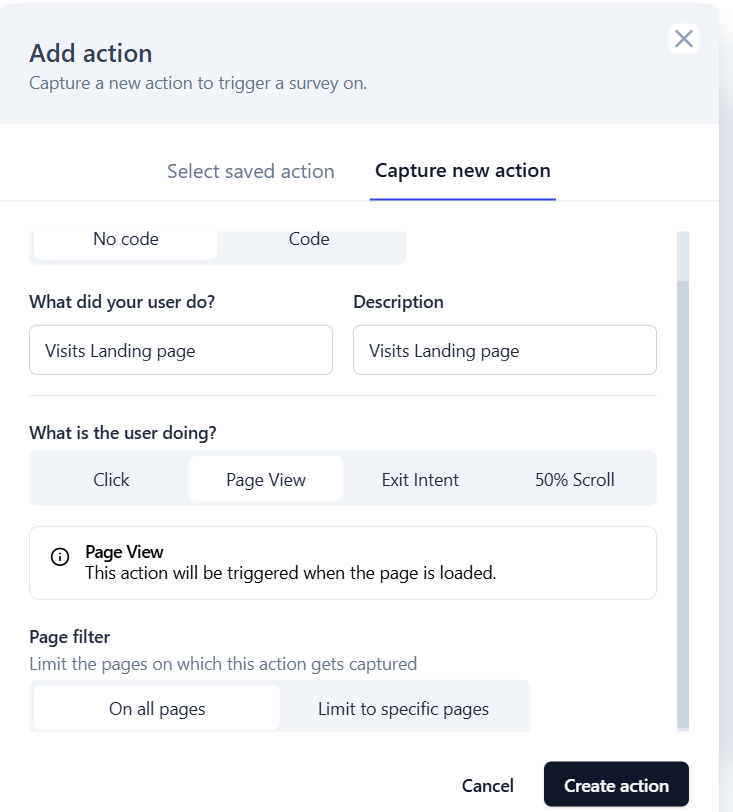
 10. **Set Trigger for the Survey**: Scroll to **Survey Trigger**, click **+ Add Action**, and select **Capture New Action** tab. Here you can configure how you want your survey to be triggered.